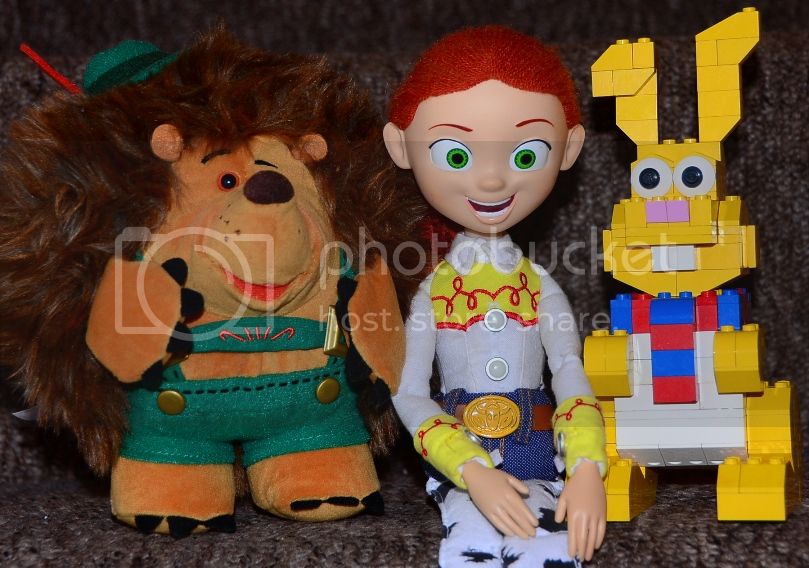
Okay, so based on the amazing efforts of booh88, I too was able to construct a “practice version” of the bunny.
We were missing a few parts like the eyebrow piece, and a few angle pieces that make up the bottom of the stomach, as well as the rounded block for the top of the scarf, but here he is…
Next up, the dismantle, and ordering of the parts needed. I’ll document my process here as well if thats all right with booh88, and like him, I wont be going into full specifics on the actual construction out of respect for the Cuusoo project.
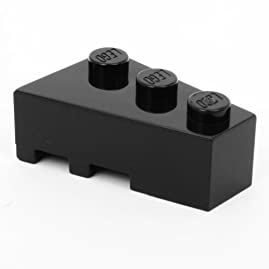
I did in fact locate the part on ebay in yellow. Odd that they aren’t available on the pick a part site in any color. Its not really an odd piece as it’s been available in many many sets in various colors. Oh well, problem solved and parts on the way. And just as a matter of record here’s the piece on black…
I’ll more specifically show needed parts once I can provide pics of properly colored bricks.
I replaced any wrong colored parts with proper colored bricks with anything I had in house. Everything else was ordered from either the Pick A Brick site on Lego.com or ebay. Now it’s just a waiting game.
Mean time, I thought I’d answer a few questions that I’ve received.
First, the pink nose bricks. These weren’t available on Pick A Brick, so I found the cheapest set currently available that had a minimum of 2 of the bricks…
Voila!
Of course that meant I was spending $3.99 for 2 dinky bricks, but I don’t care. If you’re going to do this…might as well do it right!
Next question was about the eyes…how are they attached?
It’s really a very simple process…you need 2 sets of these…
assemble like so…
and add eyes…
At this point I guess there will be a pause in progress while everyone waits for parts to arrive.
Do a Pick a Brick advance search for Element ID ‘4599538’. Do you not think that is the correct colour?
That is the element I ordered. OK so it is listed as Light Purple, but it looks like a match to me. Maybe I’m wrong… so annoying knowing my pieces arrived a week ago but with no way to build them until the end of the month.
From the graphic on the site it looks right. However they do sell light purple pieces as well if you’ll look at that set I got my nose pieces from. Only way to know for sure is once you have yours in hand.
Nearly finished my rabbit with all the correct colours (thanks for the pics!). One question - I see that you’ve made the tail mostly from white plates. Is there evidence to suggest that it should be plates, as to my eye it looks as if it could also be constructed from bricks?
I don’t like to be the bearer of bad news, but you’re not quite 99% finished I’m afraid.
This is one of the joys I find in the whole process, the discovery of new information and research that leads to a more accurate end result. It turns out that we have a key part of the head construction wrong.
As recently Tweeted by Angus Maclane (creator of the LEGO Bunny) in response to another Lego bulder:
This makes a lot of sense. While researching the initial construction I was very confused about the height of the cheek tiles. It didn’t look like the tile was flush to the head, but when I put a 2x2 plate beneath it it looked too high. This solves the mystery, as the width of the bracket accounts perfectly for my confusion, and is consistent with every available image.
This of course means that a few other bricks in the head need to be changed. A couple of 1 x 1 square plates either side of the bracket, and a 1 x 4 plate beneath replacing the middle tier. Three 2 x 3 bricks can then make up the horizontal width of the head instead of the rear 1 x 6 beam.
I have ordered these pieces and await them to complete an even more accurate final version.
I think when I’ve built it I’ll tweet Angus Maclane asking if he has any feedback. Maybe he’ll outright post instructions! Although I feel by now that wouldn’t be as fun as this method of meticulous research.
Also to answer Howlrunner:
There is no unnecessary part use of plates in the tail. There are no places where a single brick can replace tiered plates because the maximum height of the stacks (as you’ll see from my close up earlier in this thread) only ever reaches two, which is one short of a full brick height. Where a brick can be used, it has been.
Sorry if I wasn’t clear in what I was saying. What I meant was, instead of a 2x2 brick in the middle of the tail, surrounded by a double layer of 1x2 tiles, is it possible that it is a 2x2 brick with a 2x2 plate on top, surrounded by 2x1 bricks?
Congratulations Doombuggy. You beat me to it narrowly
I’m annoyed with myself… as you can see I ordered every single necessary piece in the correct colour apart from one. I forgot to order myself his 2 x 2 corner ear slope Grr! I have now however ordered this last final piece.about
A fine addition to any collection! And a fun one to research and build. As far as I know this is roughly 97-100% screen accurate, with only some mystery as to the bricks used inside and on the rear. My construction and brick choice however is visually accurate to all the available material, and where no material exists I have taken the most logical and efficient build choices.
I’ll be sure to show Angus Maclane on Twitter and ask for any tips regarding further accuracy. Until my ear piece arrives however, I am for now content.
And as a note of interest Doombuggy, the ‘Light Purple’ listed 1x1 slopes on the LEGO Pick-a-Brick site are the correct colour. They should be listed as pink I think, a much more accurate description. As it was I got a LEGO Friends set as well, meaning I now have 9 of the correct colour nose slopes! Ah well, guess that means I have enough pieces to try my hand next at the block, stairs and ladder formation…
Sucks about the ear piece to be sure, but a quick fix. Thanks for laying all the ground work for this booh88, I could have done it without you, but it would have taken a hell of a lot longer, and I think these projects are a lot more fun working as a group and sharing info. I’m sticking with just the rabbit, so his alternate forms are all yours! It’ll be interesting to see just how many extra pieces are required beyond just what’s in the bunny form. Truly wish there were more “group build” projects possible, they’re more fun then working alone!
you can find mine right here flickr.com/photos/67229291@N07/#
(= thanks for the help on finding pieces i love the bunny i know the hands aren’t right i have the pieces i just kinda like this way more lol also more pics of the collection coming up very soon
Wow those are completely accurate! I didnt even realize the bunny kept changing form. Perhaps if I had seen it more than once I would have caught on to that
I “finished” mine a week or two ago, but then had to wait to get the newly discovered cheek angle plate. But now he’s done! Thanks for all the work that has been done in this thread.
Sorry for the late “congratulations” on completing your bunny. He really is a great character to have in the collection. As a life long collector of Legos I knew I had to build him as SOON as I saw Toy Story of Terror. On that note, I was really tempted to start work on a Combat Carl but was afraid that we may see one down the road. I was a bit disappointed that they didn’t release any merchandise tied into the special. If the Christmas special comes and goes without any merchandise I’d say it’s safe to start custom work. I hope they were simply using the first special to test the water. Obviously it did well enough in the ratings to facilitate a second special.
Okay, finally got a chance to get a parts list together for the Bunny. Here’s the deal though, everyone that’s built this bunny has done so using both the information in this thread, and a healthy dose of Lego knowledge. So all the info you need to get this done is right here throughout this thread. As was mentioned earlier, out of respect for the Cuusoo project we wouldn’t be posting a step by step on building this guy. What I can do is simplify building this guy for anyone wanting to build him by at the least providing a parts list. From there, you just have to figure out how to put him together…so here it is:
Lets start with the head…
and the parts you’ll need…
Next, the tail…
and the parts you’ll need…
Now the legs…
This is what you need for one leg, so you’ll need these parts times 2…
And finally the body…
And here are all the parts you need…those two little red pieces in this picture can be replaced with 2 yellow single stud plates, they’re internal pieces that you’ll never see.